
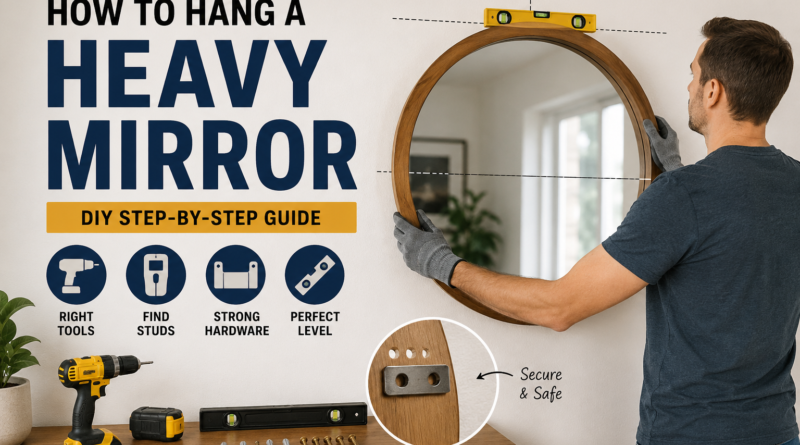
How to Hang a Heavy Mirror DIY: A Real Guide From Someone Who’s Been There
Alright, so you’ve got a heavy mirror sitting on your floor. Maybe it’s been there for two weeks. Maybe longer. You keep walking past it, thinking “yeah I need to deal with that,” and then finding literally anything else to do instead.
That’s fair. Heavy mirrors have a way of making people nervous. Drop it and you’ve got a shattered mess. Hang it wrong and it comes off the wall at 3am. Neither scenario is great.
But here’s the thing — this project really isn’t that bad once you understand what you’re actually doing. It’s mostly just prep work, a few careful measurements, and choosing the right hardware. I’ve helped a few friends do this and the ones who took their time with the prep had zero problems. The ones who wung it… well, one of them still has a very obvious patch on their dining room wall.
So let’s do this properly.
Why People Mess This Up (And Why You Won’t)
Most hanging disasters happen for one of three reasons. Wrong anchors, skipped measurements, or no help carrying the mirror. That’s genuinely it. People grab whatever hardware is lying around, eyeball the placement, and try to wrestle a 60-pound mirror onto the wall solo.
Think about what you’re actually asking the wall to do. You’re asking it to support something heavy, potentially forever, without any shifting or giving. The wall can absolutely do that — but only if you give it the right tools for the job. Pair a heavy mirror with weak anchors and you’re setting up a failure that’s just waiting to happen. Match it properly and that mirror will outlast every piece of furniture in the room.
What You Actually Need to Gather
Seriously — get everything before you start. Running to the hardware store mid-project is the kind of thing that turns a 45-minute job into a four-hour ordeal.
Tools That’ll Do the Job
- Power drill — cordless is fine, just make sure it’s charged
- Drill bits appropriate for your wall type
- Stud finder
- Level — longer ones are much easier to work with
- Tape measure
- Pencil
- Safety glasses — drilling into walls kicks up debris
The Hardware Stuff
- Heavy-duty anchors, weight rated for what you’re hanging
- Wood screws or lag bolts if you’re hitting studs
- French cleat system or mirror brackets
- Masonry plugs if you’re working on brick
One note on the hardware — look at the weight rating on the package and don’t just pick whatever says “heavy duty” on the label. Those two words mean almost nothing without an actual number. If your mirror weighs 55 pounds, you want anchors rated for at least 80. Give yourself real margin.
Know Your Wall Before You Do Anything Else
Genuinely the most overlooked step. Your wall type isn’t just trivia — it changes your drill bit, your anchor choice, your technique, everything. Two minutes figuring this out saves a lot of headaches.
Drywall — Probably What You’ve Got
Tap your wall lightly. Hollow sound? Probably drywall. Most homes built after the 1960s are drywall throughout. It’s workable but not super strong on its own — you need to either find a stud behind it or use proper hollow wall anchors. Standard picture hooks and thin nails aren’t even worth discussing for something heavy.
Plaster — The Tricky One
Older homes often have plaster walls and they behave totally differently. More solid when you tap them, harder to drill through, and they crack if you’re aggressive with the drill. Sharp masonry bit, steady pressure, and patience. Once you’re through the surface though, plaster actually holds anchors really nicely — better than drywall in a lot of cases.
Brick or Concrete — Tough But Trustworthy
These walls are basically indestructible once your anchor is set. Getting there is the challenge. You need a hammer drill — a regular drill will spin against masonry and go nowhere useful. If you don’t own one, most hardware stores rent them. Use masonry anchors, follow the sizing instructions, and you’ll have one of the most secure hangs possible.
Choosing the Right Spot (This Part Matters More Than People Think)
Before you make a single mark on the wall, actually stand in the room and look at it. Where does your eye naturally land? Where does the mirror make sense given the furniture around it?
Standard advice is to center the mirror at around 57 to 60 inches from the floor — that’s roughly eye level for most adults. If it’s going above a console, dresser, or fireplace, leave a 6 to 8 inch gap between the furniture and the mirror’s bottom. Less than that and the whole thing feels suffocating, like the mirror is sitting on top of the furniture rather than hanging above it.
And think about reflections. Mirrors facing a window? Amazing — they bounce light around and genuinely make spaces feel bigger. Mirrors facing a cluttered corner or a dark hallway? Less amazing. It’s worth walking around and looking at what the mirror will actually be showing before you commit.
Finding Studs — Don’t Skip This
If there is one piece of this whole guide that matters most, it’s this: find the studs in your wall and use them if you possibly can.
Studs are the vertical wooden beams inside your walls. They’re structural, solid, and they can hold far more weight than any anchor in open drywall ever will. A screw properly driven into a stud is legitimately one of the most reliable things you can hang something from.
Run your stud finder slowly along the wall and mark wherever it signals. Studs are usually 16 inches apart, so once you find one, you can measure across to roughly predict the others. Always do a small test hole before fully committing — stud finders are helpful but not perfect, and hitting a pipe or electrical wire is a much worse day than drilling an extra test hole.
Three Ways to Actually Hang a Heavy Mirror
Your approach really depends on the mirror’s weight, your wall, and whether aesthetics matter for the back of the installation.
French Cleat — My Personal Favorite
Two strips of wood or aluminum, both cut at 45-degree angles. One gets screwed to the wall, one to the back of the mirror. They slot together and the weight gets distributed evenly across the entire length of the cleat rather than sitting on one or two small screws. It’s the method cabinet makers and contractors have used for heavy items for decades and there’s a reason it hasn’t been replaced — it just works incredibly well. For anything over 50 pounds, start here.
Mounting Brackets — Clean and Simple
Metal brackets that hold the mirror by its edges or back frame and screw into the wall. Very clean looking, easy to source, and straightforward to install. Work particularly well with framed mirrors where the bracket can grip the frame itself. Nothing fancy, just reliable.
Toggle Bolts — When Studs Aren’t Cooperating
Sometimes the studs are 16 inches in the wrong direction. Toggle bolts — the good quality ones — expand behind the drywall when you tighten them, creating a wide grip that can hold real weight. Some are rated for 75 to 100 pounds in drywall. Use at least two anchor points spread across the mirror’s width. One central point is never as good as two spread ones.
The Step-by-Step Part You’ve Been Waiting For
Here’s the actual process.
Step 1 — Get Your Measurements Right
Measure from the floor to where you want the mirror’s center to be. Then check the back of the mirror — find where the hanging hardware actually sits and measure from the mirror’s center down to that point. That second measurement tells you exactly where your screws need to go on the wall. Not the top of the mirror. The hardware location. This is where most people get confused and end up with holes in the wrong spot.
Step 2 — Find Those Studs
Scan your target area with the stud finder. Mark any studs that fall near your drilling points. If they line up with where you need to hang — use them, that’s ideal. If not, you’re going with anchors and that’s completely fine.
Step 3 — Drill Your Holes and Set Hardware
Drill pilot holes at your marked points. For studs, drive appropriate screws. For toggle bolts, follow the instructions — the required hole size is often bigger than you’d expect, and using too small a hole prevents the toggle from opening properly. Tighten everything until it’s firmly seated. Snug, not stripped.
Step 4 — Two People, One Mirror, Done
Get someone to help you. This part is genuinely not a solo job. One person to lift and hold, one to guide it onto the hardware and check that it’s seated properly. Step back, check the level, make small adjustments. When it looks right, push the mirror firmly against the wall to confirm it’s fully locked onto the hardware.
Hanging Without Studs — Yes, It’s Possible
No studs in the right position? Happens more often than you’d think. The answer is quality toggle bolts used at multiple points. Two or three anchor points spread across the mirror’s width distribute the load much better than one central anchor, even a strong one. Just make sure each anchor is rated comfortably above what you’re asking it to hold, and you’re good.
Safety Stuff You Really Shouldn’t Ignore
- Wear the safety glasses. Drilling debris goes upward.
- Use a second person for the lift — mirrors are heavy, awkward, and unforgiving
- Don’t hang above a bed or sofa unless you’re genuinely certain about the installation
- Hardware rated higher than you need is never a bad thing
- Check back 24 hours later to see if anything has loosened or shifted
Things That Go Wrong and How to Not Let That Be You
Buying anchors by name instead of number. “Heavy duty” means different things to different manufacturers. The weight rating is the only thing that matters.
Drilling at the wrong height. People measure where the top of the mirror will be, then drill there. But the hardware on the back is lower than the top. Measure from where the hardware sits, not the mirror edge.
Not using a level. A slightly crooked mirror is the kind of thing that seems minor until you live with it. It’ll drive you crazy. Check it every time.
Trying to go it alone with the heavy stuff. The drilling is a solo job. The lifting is not. Two people make this so much easier and safer.
That’s Really All There Is To It
Look — heavy mirror, solid wall, right hardware, two people for the lift. That really is the whole formula. Once you’ve done it once you’ll wonder what you were even worried about.
Take the prep seriously, don’t rush the measuring, and don’t try to save money on the anchors. Do those three things and you’ll have a mirror that hangs perfectly for years. Maybe decades.
Now stop staring at that mirror on your floor and go hang it.
FAQs
1. How heavy is too heavy for a DIY hang?
For most people with basic tools, up to about 80 pounds is manageable if you use the right method. Beyond that — especially with a tricky wall type — it’s not a bad idea to bring someone in. The risk-reward math just changes at a certain point.
2. Can toggle bolts really hold a heavy mirror in drywall?
Yes, absolutely — but only if you buy quality ones and install them correctly. Check the weight rating on the package, use multiple anchor points, and don’t cut corners on the hole size. Done right, toggle bolts are seriously reliable.
3. What if I can’t find studs in the right position?
Super common situation. Use multiple heavy-duty toggle bolts spread across the mirror’s width. Two or three good anchor points beat one perfect stud position when the math works out on weight rating.
4. Will drilling into plaster crack my walls?
It can if you’re aggressive. Go slowly, use a sharp masonry bit, apply steady moderate pressure rather than forcing it. A small piece of painter’s tape over the drill spot can also help prevent surface cracking around the hole.
5. How do I check if an anchor is set properly before hanging anything?
Once it’s installed, grab it and give it a confident tug — not a jerk, just a firm pull. A properly set anchor won’t budge at all. If it spins or moves, it didn’t set right and needs to come out and be replaced. Don’t skip this check.
