The Ultimate Guide to Waterproof Basement Flooring: What Works and What Doesn’t
A few years back, I made a classic homeowner mistake. I bought a beautiful box of laminate flooring, hauled it down to my basement, spent an entire weekend installing it and watched it buckle and swell within two months. Two months! All that work, gone. Why? Because I didn’t take moisture seriously. I treated my basement like any other room in the house, and it punished me for it.
Here’s the thing about basements, they’re not like the rest of your home. They live below ground, they’re surrounded by soil that holds water, and they’re usually the first place that suffers when rain comes pouring down. If you’re going to put money into basement flooring, you need to understand what you’re working with before you buy a single plank or tile.
This guide is everything I wish someone had told me before I wasted that weekend. No fluff, no vague tips just real, practical information about what works underground and what doesn’t.
The Moisture Problem Nobody Talks About Enough
Before we even get to flooring materials, we need to talk about water. Not just flooding — that’s obvious. I mean the quieter, sneakier kind of moisture that destroys floors slowly, invisibly, over months and years.
The Sneaky Sources of Basement Moisture
Most homeowners assume moisture means a leak or a flood. But moisture in your basement is usually much subtler than that. Here are the culprits you should know about:
- Groundwater wicking up through your concrete slab — happens even in ‘dry’ basements
- Condensation forming when warm, humid air meets your cool concrete walls and floor
- Plumbing sweating or slow-dripping from pipes running through the space
- Rainwater pooling near your foundation when gutters or yard grading aren’t right
- Hydrostatic pressure pushing water through tiny cracks you didn’t even know were there
Any one of these — on its own — can ruin a floor that wasn’t chosen with moisture in mind. All of them together? Forget it. Your floor doesn’t stand a chance.
A Simple Plastic-Sheet Test You Should Do Right Now
Don’t spend a dollar on flooring until you’ve done this. Grab a sheet of plastic — an old garbage bag works fine — and tape a 12-inch square of it flat against your concrete floor. Seal all four edges completely with tape. Leave it alone for 48 hours, then come back and peel it up.
Moisture on the underside of the plastic? That’s coming up from the slab. Moisture on the top? That’s condensation from the air. Either way, you have a moisture issue to deal with before installing anything. I wish I’d done this test before my laminate disaster — would have saved me a lot of grief.
Flooring That Actually Holds Up Down There
Okay, now for the materials that earn their place in a basement. These aren’t perfect options — nothing is — but they’re the ones that hold up when conditions get rough.
Luxury Vinyl Plank — Honestly, Just Get This
If I were building a basement today, I’d start and probably end my search with luxury vinyl plank. LVP is 100% waterproof — not water-resistant, not moisture-tolerant, but genuinely waterproof. You can mop it, spill on it, run a dehumidifier right next to it for years, and it doesn’t care.
What I love about LVP is that it looks incredible. The wood-look options today are almost impossible to distinguish from real hardwood unless you get down on your hands and knees and really study it. It’s comfortable underfoot, it installs relatively quickly (even for a DIYer), and it holds up to temperature and humidity swings that would destroy other materials.
If you’re also thinking about flooring for the rest of your home, you might want to compare LVP against engineered hardwood for above-grade rooms — this guide on how to choose the best engineered hardwood flooring breaks it down really well. But for the basement itself? LVP wins.
Tile — The Old-School Champion
Ceramic and porcelain tile have been going into bathrooms and basements for decades, and there’s a reason they’re still around. Tile is naturally water-resistant, and porcelain specifically is nearly impermeable — water basically can’t get through it. Pair that with a good grout sealer and you’ve got a surface that can handle standing water for extended periods without flinching.
The trade-off is comfort and install effort. Tile is cold and hard, installation is more involved, and if your concrete has significant cracks or movement, grout can crack over time. For utility areas, laundry rooms, or basements in warm climates, though? Tile is a fantastic call.
Epoxy Coatings — When You Mean Business
Epoxy isn’t really flooring in the traditional sense — it’s more of a coating you apply directly to your concrete slab. But that’s exactly what makes it so effective. It bonds directly to the concrete and creates a continuous, sealed surface with no seams for moisture to sneak through.
It’s the go-to for garages, workshops, and utility-heavy basements. It’s incredibly durable, resists chemicals and stains, and cleans up with almost no effort. The downside is that it can be slippery when wet unless you add anti-slip additives, and the application process takes patience — you need to prep the concrete properly or it won’t adhere.
Epoxy vs. Polyurea — Which One’s Right for You?
Both are resin-based coatings and they serve similar purposes, but polyurea is more flexible, cures faster (sometimes in a matter of hours), and handles temperature extremes better. Epoxy is denser, takes longer to cure, and is generally cheaper. For most homeowners, epoxy does the job beautifully. If your basement gets very cold in winter or you want the fastest possible turnaround, polyurea is worth the premium.
Flooring That Will Let You Down (Literally)
Solid Hardwood — Love It, But Not Here
I’ll always have a soft spot for real hardwood. It’s warm, it’s timeless, and nothing else quite matches it aesthetically. But solid hardwood and basements are genuinely a bad match. Wood is hygroscopic — it absorbs and releases moisture constantly — and in a below-grade environment, that means it’s going to expand, contract, cup, and warp. It’s only a matter of when, not if. The properties of hardwood make it beautiful in living rooms and bedrooms, but those same properties make it risky anywhere near ground level.
Standard Laminate — Be Very Careful
This one stings personally, for obvious reasons. Standard laminate flooring has a wood-fiber core that swells when it gets wet — and in a basement, moisture can come from underneath even when the surface looks completely dry. Some newer laminate products are marketed as waterproof, and some genuinely are, but you need to read the fine print carefully and pair them with a proper vapor barrier. One wrong step and you’re tearing it all out again.
What Goes Under the Floor Matters Just as Much
You could buy the most waterproof flooring on the market and still end up with a ruined floor if you ignore what’s underneath it. The subfloor and vapor barrier layer is where a lot of homeowners make critical mistakes.
Vapor Barriers — Don’t Skip This Step
A vapor barrier is a layer of plastic sheeting or specialized membrane that sits between your concrete slab and your finished flooring. Its job is simple: block ground moisture from migrating upward and causing havoc. Even if your flooring is completely waterproof, moisture can pool underneath and eventually cause mold, odors, and adhesion failure.
For most basements, a 6-mil or thicker polyethylene sheet does the job. For areas with known moisture issues, consider a dimple mat — it creates an air gap between the slab and your flooring that allows any moisture to dissipate rather than build up. It costs a bit more but it’s worth every penny in a problem basement.
Picking the Right Option for Your Specific Basement
There’s no single right answer for every basement. Your decision should be based on how your specific space behaves. Here’s a quick decision framework:
- Mild humidity, used as a living room or bedroom → LVP is your best friend
- Frequent moisture or occasional water intrusion → tile or epoxy, full stop
- Workshop or utility room → epoxy coating, add anti-slip grit
- Tight budget → LVP still gives excellent value; avoid tile installation labor costs
- DIY installation planned → LVP is far more forgiving; tile and epoxy need more skill
How to Install It So It Actually Stays Waterproof
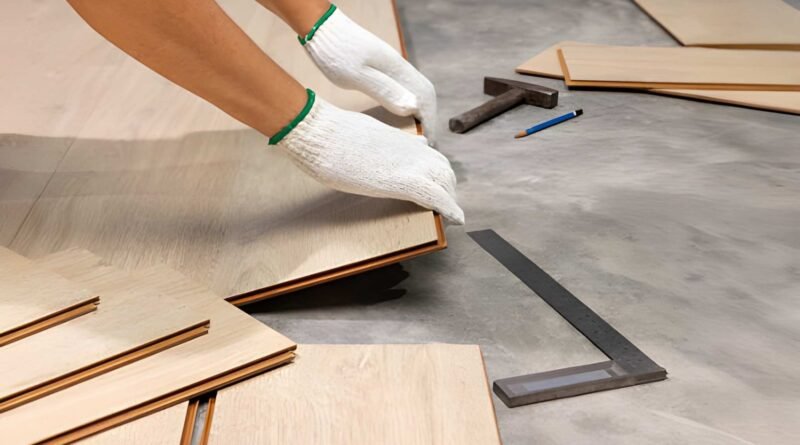
Good materials installed carelessly will fail. These are the installation steps that matter most:
- Test for moisture first — do the plastic sheet test before buying anything
- Level your slab — dips and humps trap moisture and cause uneven wear
- Lay your vapor barrier with overlapping seams, taped at all joints
- Leave expansion gaps at walls for LVP and laminate (usually ¼ inch)
- Seal tile grout and all perimeter edges with silicone caulk after installation
- For epoxy, etch or grind the concrete first — adhesion is everything
Keeping It Dry for the Long Haul
Installing the right floor is step one. Keeping it in good shape is the part people forget about. Even waterproof flooring benefits from some basic maintenance habits:
Run a dehumidifier year-round and aim to keep your basement’s relative humidity below 50%. Check your walls and floor edges every season for new cracks, white mineral deposits (called efflorescence), or any musty smell — these are early warning signs. Re-seal tile grout every couple of years. And if your sump pump is the thing standing between your basement and a flood, test it regularly. A $20 test today beats a $3,000 flooring replacement next spring.
Wrapping It All Up
Basement flooring isn’t complicated once you understand what you’re actually dealing with. Moisture is the main enemy, and every decision you make should be filtered through that lens. LVP is the smartest all-around choice for most homeowners — it’s waterproof, beautiful, and DIY-friendly. Tile wins in wet utility spaces. Epoxy owns the garage and workshop crowd. And hardwood? Save it for upstairs where it belongs.
Whatever direction you go, don’t cut corners on your vapor barrier, and don’t skip the moisture test. Those two steps alone will save you from the exact mistake I made. Your basement has real potential — give it the foundation it deserves.
FAQs
1. What is the single most waterproof flooring for a basement?
Luxury vinyl plank and epoxy coatings are the most water-resistant options available for basements. Both are completely impervious to water when properly installed with a vapor barrier underneath.
2. Can I install real hardwood in my basement if I seal it really well?
It’s not recommended. Even with aggressive sealing, solid hardwood expands and contracts with humidity changes that are unavoidable in below-grade environments. The look just isn’t worth the risk — LVP gives you the same aesthetic without the drama.
3. Do I really need a vapor barrier if I’m using waterproof flooring?
Yes, always. Waterproof flooring means water won’t pass through the material itself, but moisture can still accumulate in the air space underneath and cause mold, odors, and adhesion issues over time. A vapor barrier stops ground moisture before it ever reaches your floor.
4. How do I know if my basement moisture is serious enough to need professional help?
If you see active water seeping through walls or the floor during rain, visible mold growth, or white crystalline deposits on your concrete (efflorescence), those are signs of a structural drainage issue that needs a waterproofing contractor — not just better flooring material.
5. How long does waterproof basement flooring typically last?
With proper installation and basic maintenance, LVP typically lasts 15–25 years. Porcelain tile can last 50+ years. Epoxy coatings usually last 10–20 years depending on traffic and whether the concrete was prepped correctly before application.